
Tuscany: a beautiful sun-drenched land steeped in history with magical medieval hilltop towns nestled amongst olive tree groves and vines heavy with luscious grapes. The stunning cypress-lined country roads and endless undulating hills were every bit as beautiful as the postcard-perfect photographs I’d seen.
And the food – oh my! From the fragrant juicy sun-ripened peaches, melt-in-the-mouth cured meats, earthy truffles and porcini mushrooms to rich and hearty wild boar stew, flavour-intense gelatos and perfect pastas – all washed down with bottles of delicious Chianti. Picnic lunches were extravagant feasts of chargrilled artichokes, sweet sun-dried tomatoes, roast peppers, marinated olives, slices of hams, myriad cheeses and freshly baked bread – the stuff of culinary dreams.
My boyfriend and I also ate some wonderful crunchy thin-crust pizza that reaffirmed just how enjoyable a simple well made pizza can be. I guess once you’ve tasted a perfect pizza made in Italy, then you’re spoiled forever.
So this holiday was a few years ago now, as you’ve probably guessed, before Covid came along and reared its ugly head. I came across some photos from the Tuscany trip and memories came flooding back. It inspired me to make pizza, something I don’t eat that often being truthful. But when I do, I wonder why it’s been such a long time as I always enjoy it.
In order to achieve the ultimate crust you’ve got to start with good dough. The type of flour used is important; use ‘00’ Tipo flour, which is the most finely ground flour available and gives you the elasticity required to stretch the dough thinly and gives you a crispy texture. Failing that, opt for good quality strong bread flour.
Proving the dough
The time to prove the dough is also important; allow the dough to slowly ferment at room temperature until it has doubled in size and then pop into the fridge for at least 6 hours, preferably longer, and up 3 days to develop flavour. It’s very quick and easy to make, no kneading required, just a few stretch and folds at intervals. You can easily sub the sourdough starter for ¼ tsp of dried yeast and adjust the schedule depending on how the dough reacts in your own kitchen environment. The dough will double in size in about 2 hours and then pop into the fridge until needed. An overnight prove works well.
Baking the pizza
In an ideal world you would cook the pizza in a wood fired oven. Obviously that’s not realistic for the majority of us so baking in a very hot conventional oven works absolutely fine. Just make sure it’s preheated at least half an hour before you plan to put your pizza in.
Shaping the dough
Lastly, try and shape the dough by hand. I’ve previously tried using a rolling pin but it’s impossible to get a proper lip and thin base. It will just spring back annoyingly too! There are lots of videos on YouTube showing you how to do this, it just needs a little practice to perfect.
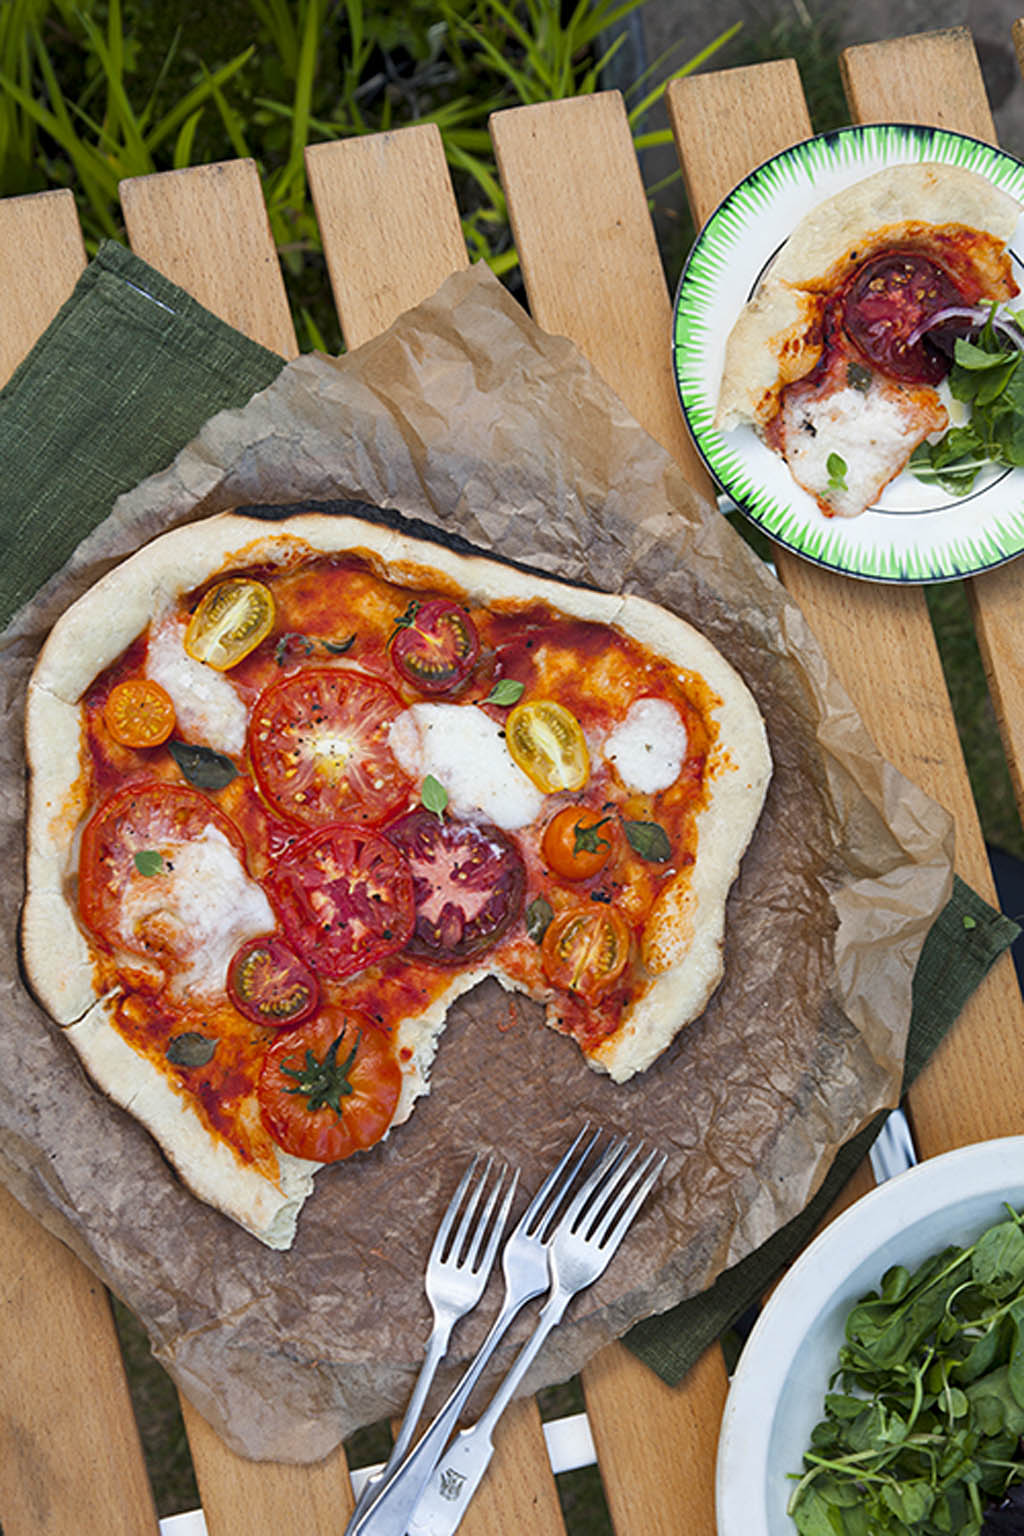
I’m really pleased with my pizza and it tastes utterly delicious, even with the slightly black charred edges due to fierce heat in the wood oven. It all adds to the authenticity! My friend just loaded the oven up with wood so it was probably a bit hotter than recommended. A second pizza didn’t even make it out alive as a burning hunk of wood planted itself directly in the middle – it was just a little too charred for human consumption, although I did try. The pizza I enjoyed so much in Italy is still up on a pedestal but I feel I’ve come a lot closer to recreating a decent one at home.
Ingredients
Pizza base ingredients
100g sourdough starter (or ¼ tsp of fast action yeast)
10g fine sea salt
375ml water at room temperature
500g Italian 00 flour (or strong white flour)
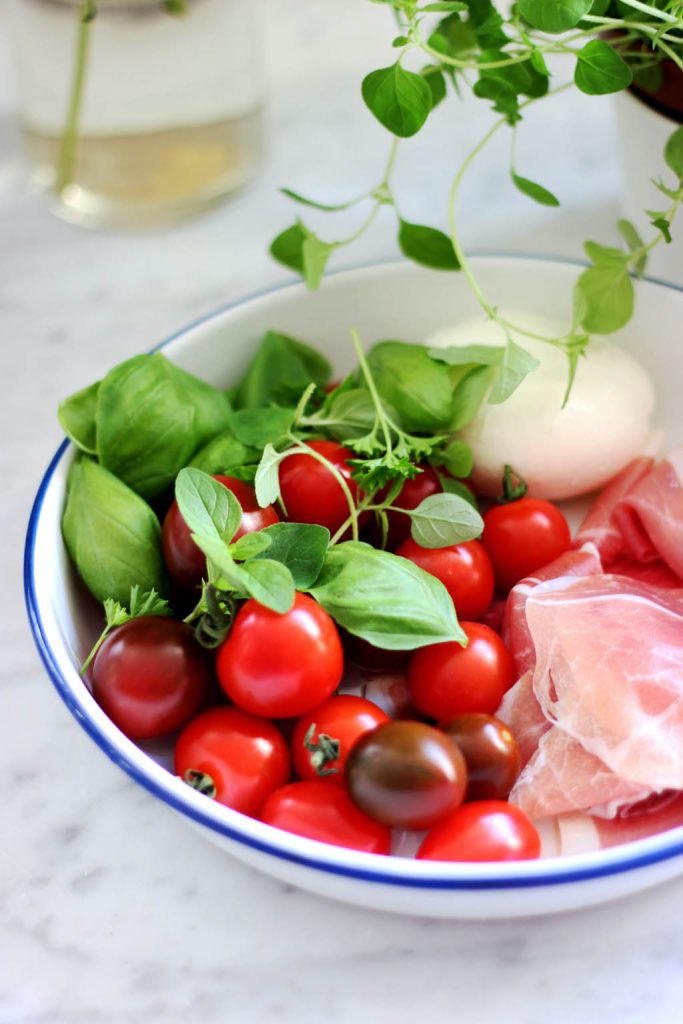
Toppings
Tomato sauce
Mixture of tomatoes, if possible
Mozzarella
Thyme or basil
Instructions
- Combine the sourdough starter, water and salt in a large bowl. Stir to combine.
- Add in the flour and mix until everything is mixed together and you have a rough dough. It’s easier if you start with a large spoon then switch to your hands.
- Stretch and fold the dough 4 times at 30 minute intervals. Cover and allow to rise for between 6-12 hours until doubled in size. It’s easier to note how much it has risen if you use a glass bowl or container. It will take longer in a chilly room and less time in a warm one.
- Flour a work surface lightly and scrape out the dough, making sure it’s facing sticky side up. Divide it into 4 equal parts and shape them into balls. For each portion, start with the top side of the dough and stretch it outwards to and the pull into toward the centre, turn the dough 45 degrees and do the same. Aim for 4-6 folds so you have a nice tight ball. Shape each portion into a round and turn seam side down. The balls should not be too sticky; if they are, dust with a little more flour.
- Then stick into individual bowl or on a try, greased with some olive oil. Cover and leave to rise for the 2nd prove for at least 6 hours and up to 3 days.
- Return to room temperature by leaving them out on the counter, covered in a damp cloth, for at least 1 hour before needed. Put your baking stone or upturned sheet in the top third of your oven and preheat as hot you can go.
- Take one ball of dough and generously flour it, your hands, and the work surface. Gently press down and stretch the ball of dough out to 10-12 inches. Don’t worry if it’s not round. Don’t handle it more than necessary; you want some of the gas bubbles to remain in the dough. It should look slightly blistered. Flour a peel, or an un-rimmed baking sheet lined with a piece of baking parchment dusted lightly with flour, and lay the dough onto the centre.
- It is now ready to be topped. Then add tomato sauce with your chosen toppings – remember, less is more.
- Slide onto your pre-heated stone or baking sheet and cook in the oven for about 6-8 minutes, so the cheese is bubbling and cooked to your liking. Slice and serve.